Tuesday, April 12, 2011

Enzo's Five-Minute Pasta Sauce

Don't get me wrong, I love cooking a pasta sauce for the better part of a day (or gravy, as we call it in my family) but sometimes you just want something fast and easy with a few simple ingredients and get on with your evening.

Here, let me set the scene for you, it's a beautiful thing: 

You get home from work. It's 6, or 7 o'clock in the evening. You're probably exhausted, let's face it, it's been a long day. Isn't it nice to know all you have to do is chop up a few garlic cloves, saute them up in a tbs. of olive oil, throw in a few crushed red pepper flakes and a 28 oz. can of whole tomatoes. Cook it for a few minutes, and call it a day? 

In five minutes, you can have a delicious sauce that tastes just as good as that sauce that spent most of the day on the stove. (Mom, don't judge me, you know I love your sauce)

So, here's the back story on this amazing recipe. I was in 5th grade, so this recipe is from 1997 (and trust me, if I remember something for over a decade it HAS to be good), at Rollins College Summer Camp in Winter Park, FL and I was taking a cooking class. A chef named Enzo, who had a very yummy restaurant aptly named Enzo's in town, came in to teach us one of his recipes. And it was on that blustery summer day in central Florida that I first learned (and tasted) this lovely gem of a recipe, and I've been making it ever since. And as soon as you try it you too will be making it for years to come, I promise!

Enzo's Five-Minute Pasta Sauce:


Ingredients:

2 tbs. of extra virgin olive oil
3 garlic cloves
1/4 tsp. crushed red pepper flakes
28 oz. can of whole peeled tomatoes
pinch of salt

Directions:

First you want to crush the can of whole tomatoes. I use my hand, but you're more than welcome to use your favorite crushing tool (a potato masher is good, too). Just make sure to keep the sauce relatively chunky. The tomatoes will cook down slightly on the stove making for the perfect chunky/smooth pasta sauce.


Next you want to slice up your garlic cloves. Instead of smashing the garlic I like to peel it and thinly slice it for this particular recipe. But this is your chance to be creative, so do this to your liking (and the same goes for that crushed red pepper...making it as hot or as mild as you want).


You want to lightly brown the garlic in a saute pan over medium-low heat. Once the garlic begins to brown, add the crushed red pepper and saute briefly. Then add your tomatoes (and be careful, they have the tendency to splatter and make a mess when they hit the hot oil, so just be careful please!).

This only needs to cook for about 5 minutes. You'll be amazed how the sauce thickens over that time. Once the sauce has reduced, check it for seasonings. I added a little more crushed red pepper and a heavy pinch of salt but this is to your liking. So be creative and have fun with it!


This sauce is a wonderful base, so add to it if you want. You could add some roasted garlic, or maybe some capers and olives and make a delicious puttanesca sauce. It's really up to you!


Tuesday, April 5, 2011

It's FAJITA NIGHT!!

Ah yes, fajita night, the evening that's almost as good as taco night. Or at least that's the way I used to think of it--that is until I discovered what one amazing marinade can do to steak, fish, chicken, you name it! A few simple ingredients can turn an ordinary meal into a great foodie adventure!!


Okay, so maybe that sounds a little cheesy but, let's be honest, it's a heck of a lot cheaper to try Mexican, Italian, Japanese, and so on (you get the picture) cuisine at home then it is to travel halfway across the globe. Sometimes it's fun to be a little adventurous with your cooking. So instead of splurging on that week-long cruise to through the Gulf coast, why not splurge on a few exotic spices!


So, let's get on with this recipe!


It's FAJITA NIGHT:


Ingredients:

1 medium white or yellow onion
1 bell pepper
1-2 cloves of garlic
olive oil
1 lime
salt and pepper
two servings sirloin (or whichever cut of beef you prefer)
1 tsp. of cumin
1/2 tsp. of dried oregano
cayenne pepper to your taste
tortillas
a handful of fresh cilantro
(salsa, guacamole, chimichurri...all yummy things you can top your fajita with!)

Directions:

The night before serving you want to begin marinating your protein. The marinade is pretty simply composed of the juice of one lime, about a quarter cup of olive oil (or 3 times as much as the lime juice) and a heavy pinch of salt and pepper. Combine ingredients together and store in the fridge over night in a heavy ziploc bag. I like to keep mine in a bowl as well, just in case any meat decides to make a run for it.

You want to take your meat out of the fridge when you start preparing everything else for dinner just to take the chill off of it. That way it will sear up really yummily!

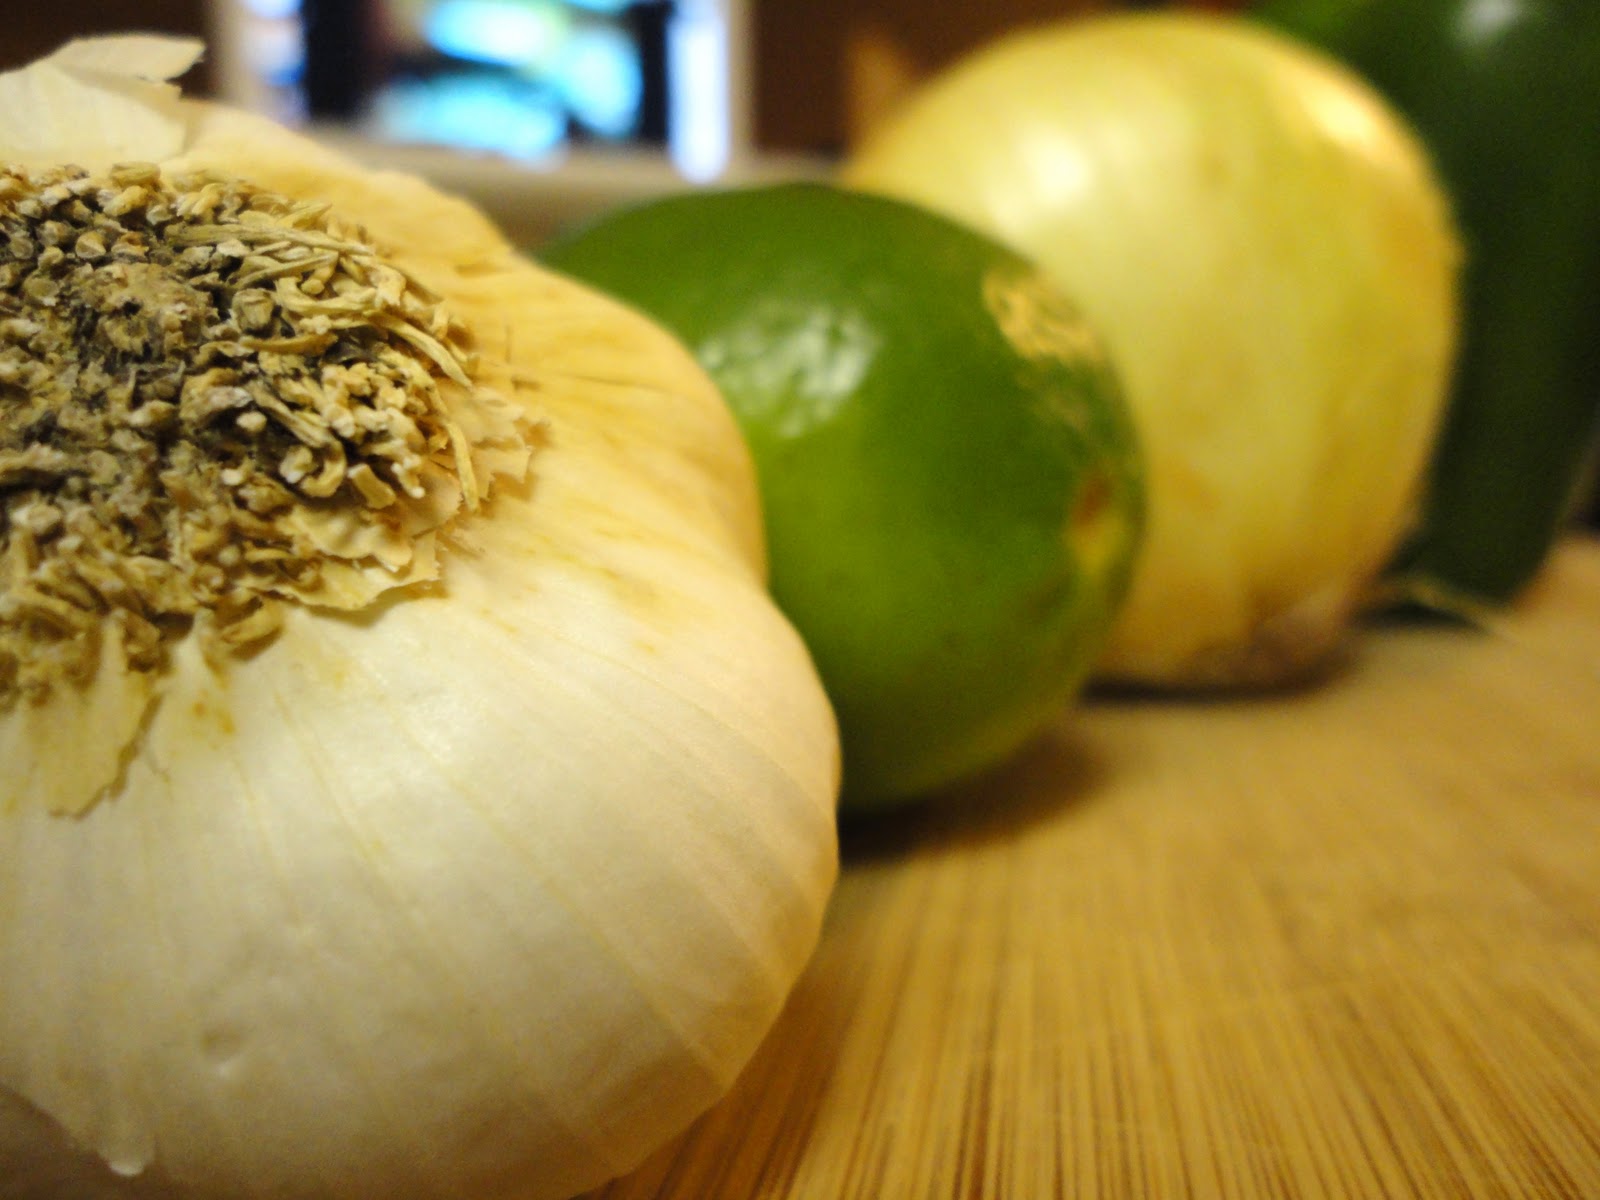
Now, below I have what I like to call the "dream team" of this recipe: garlic, lime, onion, and bell pepper as well as oregano, cumin, and cayenne pepper. I love the way smokey spices, like cumin, really add a great flavor to Mexican dishes. And these lovely veggies (or fruits) and spices really kick up the flavor of these fajitas!


First you want to begin by slicing up your onion and your bell pepper pretty thinly and shoot for about the same size for both. I usually just halve the onion and make thin slices, running from the top to the bottom of the onion, and julienne the bell pepper.

Now when it comes to the garlic, well, that I'll leave up to you. I personally love the flavor of garlic so I chop mine up pretty finely and saute it in with the peppers and onions. However, if you prefer a little less garlic flavor (don't worry, I won't judge you) then just crush the cloves, throw them in whole and remove them after peppers and onions saute.

First you want to saute the bell peppers in about a tbs. of olive oil for about 5 minutes or so, until they're starting to become tender but still maintain their lovely greenliness. 


Once the peppers are, welll, "al dente" go ahead and add the onions and the garlic. The reason I add these later mainly has to do with the cooking time of the onion and the tendency that garlic has to burn if added straight away. You want to let the onions and the peppers cook together for another five minutes or so before adding the salt, pepper and spices.

And yes, I know that looks like a ton of onions but I promise they'll begin to settle down shortly!


You can see below that after those five minutes of cooking the onions are starting to cook down and turn translucent. At this point you want to go ahead and add the spices! Yum yum!


To the onions and the peppers I added 1 tsp. of cumin, 1/2 tsp. of dried oregano, and I like 1/4 tsp. of cayenne pepper. But just be aware that cayenne pepper can get really spicy, really fast! So consider this your warning. Do it to your tastes, but be careful. That is seriously hot!


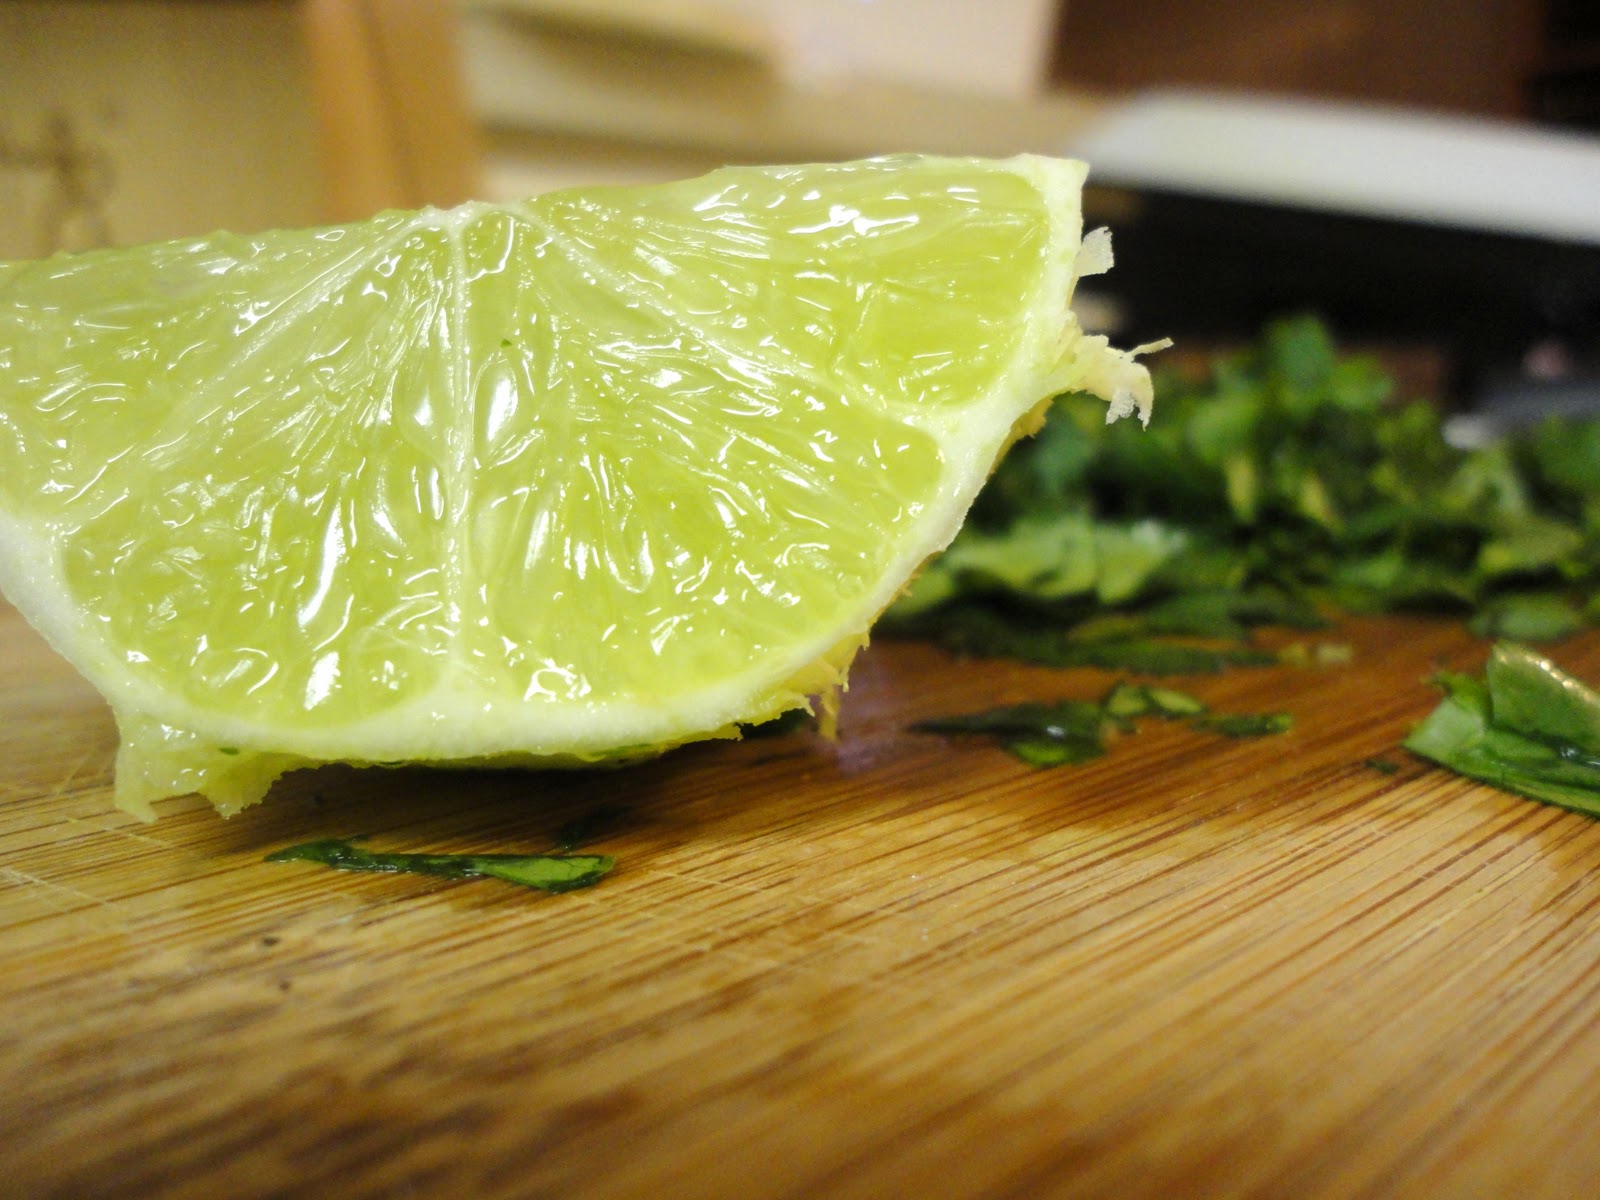
In the mean time, heat up your grill and prepare your toppings. For me, that's chopped fresh cilantro, lime zest and some lime juice! Yum! But be creative, this is really up to you. I mean, that's half the fun!


Go ahead and grill your steak to your liking, I like mine about medium to medium-rare. Yum...

Top your protein with your onions and peppers mixture and whatever other toppings you're adding. Roll it up and enjoy!!


Mmm...steak fajitas!


I hope you enjoy this recipe. Sorry it's taken me so long to update this blog but you'll be rewarded for your patience with lots of yummy recipes to come (and maybe some dorky YouTube videos as well...prepare yourself).

Until next time and, as always, buon appetito!

Thursday, December 2, 2010

The Woman FINALLY Got Her Blowtorch

So I must admit, my blog title has been a little bit, well, misleading.

Until now, that is.

As of last November I am now the proud owner of a BERNZOMATIC ST2200T. Sounds intense, doesn't it? Well, it is.

Last month, my friend Meghan (who, by the way, has her own food blog and it is FABULOUS...link below) and I went shopping. Now, not just your normal girl, giggle-filled, shopping adventure. Oh no, we had a mission.

Mission: Purchase Blowtorch.

We first went to Williams-Sonoma; the obvious choice, of course, by far. And to be honest, I was a little bit disappointed. I don't doubt for an instant that their blowtorch was great. It was just too expensive for a grad student and an unemployed historian.

Next, we went to Crate and Barrel, one of my personal faves. Now, C&B was more affordable, but we couldn't buy butane there, and well, I just decided from that point that I was going to get my blowtorch at a hardware store (a la Alton Brown style).

Our last stop of the day, Ace Hardware. I purchased a blowtorch and two canisters of butane for the same price as a Williams-Sonoma torch (w/o butane). Plus, it's called the BERNZOMATIC ST2200T. I like to call it Bernie. No judging.

I would encourage anyone to check their local hardware store first for purchasing a blowtorch. It's more affordable and is equipped with all the safety features you'd want and expect (plus, it comes with a soddering tip...SCORE).

Isn't Bernie beautiful?

Mission: ACCOMPLISHED.

I promise I'll put up good recipes soon! Currently, I am home, enjoying the holidays with the famiglia. But, as soon as I get back to Tucson I'll be sure to post some fun blowtorch-utilizing recipes.

In the meantime, I hope you'll enjoy a few of my favorite holiday recipes, including my grandmother's famous fruitcake). Ok, I know what you're thinking. But seriously, this one's soaked in bourbon. It's fine.

And, as promisted, Meghan's blog (you don't want to miss this): http://chocolatteandtea.blogspot.com/

Thursday, November 4, 2010

My Grampy's Tomato Salad

As much as I love creating new dishes and sharing my recipes, there are a few classics in my family that I just adore and wouldn't do a darn thing to them...except maybe pack them into my mouth super fast, hamster-style.

No. Judging.

And you won't judge--not after you try this delicious (and simple) salad.

My grandfather was the master of fresh pasta and gravy, and the most adorable man in the world, especially when he donned his apron.

One of my favorite recipes of his is this tomato salad. I think it's especially delicious as a side for a bbq or any dish during the summer. I know, I know, stop looking at me like that. It's not summer anymore, I get it. But since I live in Arizona, we don't exactly have a shortage of warm weather right now.

This is great at room temperature. In fact, I let mine sit out for 30 minutes or so, even if I plan on refrigerating it, just to let the flavors meld together. So this is really perfect for a tailgate, picnic, or bbq because you do not have to worry about maintaining it at a certain temperature.

So...on with the recipe!

My Grampy's Tomato Salad:


Ingredients:

4 Plum or Roma tomatoes
Quarter of a red onion
pinch of kosher salt
fresh ground black pepper
1 tbs. of extra virgin olive oil

Directions:

You want to slice the tomatoes into relatively manageable pieces. To do this, I sliced the tomatoes in half, lengthwise then cutting those pieces in half lengthwise again to quarter the tomato. I then went further to halve those pieces as well, so that the tomato was sliced into eight even pieces.


Next, I thinly sliced a quarter of a large red onion. I like to keep the onion in long, thin pieces.


Toss the tomatoes and the onion together and drizzle with about a tablespoon of extra virgin olive oil and salt and pepper to taste. I added a heavy pinch of kosher salt and only a few cranks of my pepper grinder.

Now, if you want to add another layer of flavor, one of my mom's secrets is to rub the bottom of the bowl with raw garlic. This allows a subtle garlic flavor to permeate the dish. It's delicious with or without garlic, so this is really up to your own personal taste. However, give the garlic a try. You might find that by treating the bowl with a little garlic it will add a new layer of flavor to your salad.


How yummy does that look?! Hope you enjoy this family favorite and--until next time--buon appetito!

Saturday, October 30, 2010

Lemon and Garlic Bean Dip

With the holidays coming up everyone is looking for quick and easy appetizers to serve before the big meal and visiting guests and relatives. One of my favorite quick dishes is this white bean dip. It's healthy, delicious and has only five ingredients (one of which is garlic...perfect for Halloween and keeping away those vampires ;) )!


Lemon and Garlic Bean Dip:

1 15.5 oz can of Cannellini Beans (or white kidney beans)
2 cloves of smashed garlic
the juice of half a lemon
1 tbs. of extra virgin olive oil
a heavy pinch of kosher salt

You will also need a food processor or blender (even a magic bullet works)

Rinse the cannellini beans well and place them in your food processor or blender. 


Next you want to smash the garlic to make it easier for the food processor to combine everything together. There's no need, however, to chop it finely. Just place the individual cloves on the board and place the flat part of your knife on top of a clove. Using the palm of your hand, strike the flat part of the knife, smashing the garlic. Now it should also be easy to remove the outer papery skin from the cloves.


 Add the lemon juice and garlic to the cannellini beans. 


Pulse until the mixture is nearly smooth and slowly drizzle in the olive oil until the dip reaches a smooth consistency. Finally, add the kosher salt and pulse to combine.


And, can you believe it, that's it! The dip is even better the next day, but is good straight out of the food processor as well. 


I like to add a pinch of lemon zest to the top, a light sprinkling of kosher salt and a drizzle of olive oil. I hope you enjoy this recipe as much as I do, and until next time...buon appetito!

Wednesday, October 20, 2010

Manly (yet still delicious) Steak Sandwiches

Okay, so I get it...it's football season and all the cooking shows feel like they have to talk about tailgate/manly food. Alright, I'll buy into this. Here's a man-approved steak sandwich, juicy and ready for the football season. Bring. It. On.


Most of you probably tailgate for the big football games, and grilling steak is (of course) a classic. But for those of you stuck at home, watching football on Monday nights on ESPN, here's a good recipe to try out. All you need is a skillet. 


Now, hold on. I know it doesn't scream MANLY or FOOTBALL or BBQ and I understand most men feel a strong desire to grill and you know what, if you absolutely have to then go for it. But, seriously, this sandwich is perfectly delicious made on the stovetop as well. I dare you to try it...


Deliciously Manly Steak Sandwiches:
(serving size: 2)


2 tbs. of mayo
1 tbs. of dijon mustard
1 tbs. of butter and just a touch of canola oil
2 nice pieces of sirloin (or any nice thick cut of steak, filet would be divine)
2 ciabatta rolls
1/2 cup of arugula 
2 tbs. of blue cheese crumbles
kosher salt
fresh ground black pepper


Directions:


To begin cut the ciabatta rolls in half and mix together the mayo and dijon (to make what I like to call a "dijon ailoi," but really is just a nice spicy, mustardy, delicious spread for your sandwich). 


Spread the mayo mixture evenly onto the inside of the top and bottom of the ciabatta rolls. The mayo and dijon will act as a nice barrier between the bread and the steak, keeping all those juices from making your bread too soggy.

At this point you want to heat your skillet to about medium-high heat and add the butter and just a touch of canola oil, I'd say 1/2 tbs. This will raise the smoking temperature of the butter, which keeps it from burning but still allows you to get a delicious sear on your steak.

Sprinkle the steak with salt and pepper and cook steak on each side for about 3 to 4 minutes, or until the steak is done to your liking. If you have a strapping young man in your kitchen, like I did, you can even ask him to cook it for you!


After cooking the steak remove them to a plate and tent the steak with foil, allowing it to finish cooking and rest. 

Once you've allowed the steak to rest for about 5 to 10 minutes, slice the steak and place on the bottom half of the ciabatta roll. Sprinkle each with about 1 tbs. of the blue cheese crumbles and top with 1/4 cup of the arugula. Add the top half of the ciabatta roll and you have a delicious steak sandwich!


You could really mix this recipe up to your liking. Say you wanted to add horseradish to top with caramelized onions instead of blue cheese, or add a balsamic vinegar reduction to your mayo. Or, what's that, you say you like horseradish in your mayo?

Really, the possibilities are endless...

Until next time, buon appetito!

Wednesday, October 13, 2010

Couscous Pancakes!

Growing up my mom used to make leftover mashed potatoes into the most delicious potato pancakes, so I decided to follow her lead and make my own version of leftover pancakes. Instead of mashed potatoes, however, I'm using couscous. 


Couscous Pancakes:


Couscous to me is kind of like orzo pasta, a great little starch that you can play up with innovative ingredients, or something as simple as roasted veggies and garlic. One of my favorite easy dishes to make is a roasted vegetable and garlic orzo by mixing a whole head of roasted garlic, a generous amount of romano cheese, and roasted squash, tomatoes and red onion into some cooked orzo, so I used this inspiration when coming up with a recipe for couscous pancakes. 


How to make roasted garlic:
Preheat oven to 400 degrees and slice of the top of the head of garlic to expose the cloves inside. Nestle the head of garlic in aluminum foil and drizzle about a tablespoon of olive oil over the exposed cloves. Wrap the aluminum foil over the top to completely cover the garlic and roast in the oven (cloves-side up) for about an hour. Allow the garlic to cool and then, squeezing from the base of the garlic, push out the roasted garlic cloves--which, should know look light to dark brown. 


Below is how the garlic should look when removed from the oven.


To make mashing the garlic into a spread easier, add a pinch of kosher salt. 


Ingredients for Roasted Vegetables:
1 zucchini
1 yellow squash
2 plum tomatoes
1/4 of a red onion
2 tbs. of olive oil
1 tsp. of kosher salt
1/2 tsp. of fresh ground black pepper


Preheat the oven to 400 degrees. Cut the zucchini, yellow squash and tomatoes in half, length wise, and then halve those cuts length wise as well (so you have quartered the vegetable) and cut even sized slices, about 2 inches apart. The most important part is to cut the vegetables evenly and consistently so all the vegetables roast at the same rate. 


Cut the onion into large pieces, making sure not to separate the layers too much, so the onions will impart their flavor during roasting and not burn.


Toss the vegetables in the olive oil, salt, and pepper and evenly spread on a cookie sheet or roasting pan. Roast for 40-45 minutes, being sure to move the vegetables around every 15 minutes or so to promote even browning.


This will become the base for our couscous pancakes! Are you excited? I know I am!


Ingredients for Couscous Pancakes:
3/4 cup of uncooked plain couscous
1 cup of low sodium chicken stock or broth
1/2 tsp. of salt (depending on how salty your broth/stock is)
2 tbs. of olive oil, plus 1 tbs. for frying the pancakes
1 tsp. of fresh rosemary, chopped
1 head of roasted garlic
1/4 cup of pecorino romano cheese
1 egg
1 and 1/2 tbs. of flour


You want two cups of cooked couscous, so follow your particular brand's directions to achieve this. Mine called for bringing 1 cup of stock to a boil, along with the salt and olive oil. Stir in the 3/4 cup of couscous, cover, and remove from heat.


Cooking the couscous in stock adds a ton of flavor, far more than if you cooked the couscous in just water. Use your favorite go to stock, or homemade if you have it.


Let the couscous sit for 5 minutes, covered. After 5 minutes fluff the couscous. 


At this point, you can add the rosemary, mashed roasted garlic, and cheese. Allow the mixture to cool. Once cool, mix in the egg and flour and form into small pancakes or patties. It should make about 6 pancakes. 


Place one tbs. of olive oil in a small skillet over medium heat. Brown them for 3-4 minutes on each side. I found that it was easier to do this in a small skillet, cooking only one at a time. The pancakes are a tad delicate, making flipping and placement much easier when there's just one pancake in the pan at a time.


Drain on paper towels if you'd like, and eat a room temperature or hot out of the pan, it's up to you! 


I served these over the roasted vegetables, but these would be great on their own as a side dish or appetizer. 


I hope you enjoy this recipe, and until next time...buon appetito!